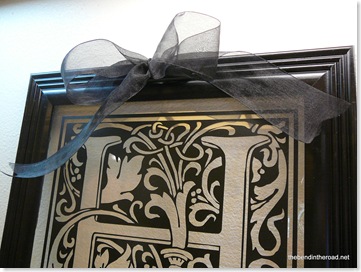
 My sister, Jen, (who is recovering nicely, as long as she doesn't get up and do too much, which she does) invited me over to her neighborhood to join her church ward in a craft night. Here's one of the things I did: a framed monogram of our family name. I hadn't seen these before, and it was fairly easy and quick to do. I give total credit to the gal that brought this craft -- this isn't my idea. But I say, share the wealth.
Everybody likes a good idea, right?
All it is, is an inexpensive picture frame, the glass, and some vinyl lettering. This craft has possibilities! Please note: I took these "how-to" pictures at home, after the class, because I didn't want to look dorky documenting every little step in front of everybody so, you will see the vinyl lettering on my glass in the steps before it's supposed to be there. Just ignore it. :-)
Get your vinyl lettering -- ordered from your favorite dealer, or bought from a craft store. (I've seen pre-made quotes at my local Robert's Crafts.) That night, the gals and I did a monogram/family name that we had ordered previously.
Here's the How To:
1. Take your frame, remove the backing and discard. With needle-nose pliers, remove any clips or other items that would help keep the picture in the frame. Remove the glass and lay aside.
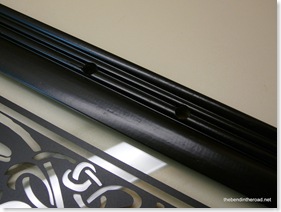
2. Drill two holes (these are 1/4 " in diameter) into the frame, if you'd like the ribbon decoration to go through the frame.
3. Take the glass and clean both sides thoroughly.
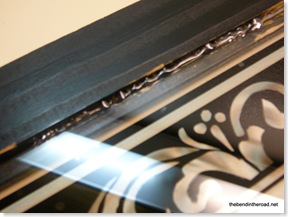
4. Turn your frame over so the back is facing up. With a glue gun, run a bead of hot glue around the insides of the frame. Lay your glass down inside the frame and press. Now, lay another bead of hot glue around the inside of the frame again; this time on top of the glass. The glass is now secured in the frame.
5. Turn the frame (with the glass inside it now) over right side up, and center your vinyl lettering in the space. Make sure it's straight. Carefully apply to the surface of the glass. If you apply your lettering from the back , it will read backwards when you hang it.
6. Add your ribbon, threading it through the two holes in the frame, tying a bow. I have a black organza ribbon through my frame. You can either choose to just have the bow (see the top picture) or leave a loop in the back, as you tie your bow, to hang the frame.
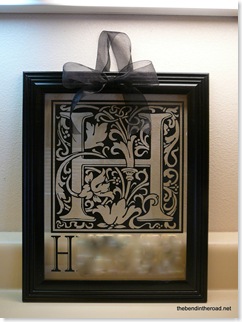
Here is what that looks like:
(Forgive the retouching; gotta stay safe on the internet...) :-)
That doesn't look too bad! I love the look of the lettering on the glass -- the paint color from the wall behind will show through...
Other possibilities:
- Wouldn't this make a great wedding gift?
- Instead of a monogram, or family name, do a quote.
- Do one of your kids' names.
- Use different colors of ribbon depending on the holiday, or the person you are doing this for.
- Line the back of the glass with scrapbook paper, holiday or seasonal colors....
I'm sure you could come up with even more ideas! Enjoy.




5 comments:
Hey all, the Nester's post today showcased a vinyl lettering gal perfect for this project! Go check it out.
http://nestingplacenc.blogspot.com/2008/10/keep-moms-in-business-buy-handmade-and.html
Great idea! Thanks.
Our parallel universe continues in a sense...today I got invited to a "vinyl lettering" party. This is a great idea. I'll have to try to go if I can. It would be neat to do the kidlet's initials for their rooms.
What fun! This is a beautiful project!
I liked seeing the family name all done up. I imagine a good quote would be eye-catching in there as well.
Post a Comment